
树莓派 4B 上手
新冠疫情期间,宅在家中,入了个树莓派 4B 4GB版本玩。
基本硬件
树莓派 4B 4GB主板,电源线,micro HDMI连接线,TF卡,读卡器
下载 Raspbian系统
下载最新版的Raspbian Buster with desktop或者Raspbian Buster Lite,网址https://www.raspberrypi.org/downloads/raspbian/ 。
官网下载太慢,可到国内镜像站下载,例如清华镜像站地址为https://mirror.tuna.tsinghua.edu.cn/,其中有raspbian-images,点进去可以下载。其中的rspbian, raspbin_lite和raspbin_full分别对应官网上的Raspbian Buster with desktop,Raspbian Buster Lite和Raspbian Buster with desktop and recommended software,大小差别是巨大的433MB,1138MB和2352MB。
这里下载的是raspbin的image (2020-02-05-raspbian-buster.zip文件)
https://mirror.tuna.tsinghua.edu.cn/raspbian-images/raspbian/images/raspbian-2020-02-07/
和raspbin-lite的image (2020-02-05-raspbian-buster-lite.zip文件)
https://mirror.tuna.tsinghua.edu.cn/raspbian-images/raspbian_lite/images/raspbian_lite-2020-02-07/
下载后,在(Dos)命令行验证SHA256
certutil -hashfile 2020-02-05-raspbian-buster.zip SHA256
SHA256 哈希(文件 2020-02-05-raspbian-buster.zip):
c55586bd4c021b09025af02b7cc2f6f8f33783cc0fcbbfb661c729deaca313e8
CertUtil: -hashfile 命令成功完成。
certutil -hashfile 2020-02-05-raspbian-buster-lite.zip SHA256
SHA256 哈希(文件 2020-02-05-raspbian-buster-lite.zip):
7ed5a6c1b00a2a2ab5716ffa51354547bb1b5a6d5bcb8c996b239f9ecd25292b
CertUtil: -hashfile 命令成功完成。
经验证,与官网提供的校验码一致。
将Raspbian系统烧录到TF卡
格式化TF卡
下载最新的SD Card Formatter 5。用来格式化已经烧录过系统的TF卡。由于之前玩老版树莓派时已经在所用TF卡上烧录过raspbian wheey系统,通过读卡器将TF卡连电脑后,看到的TF卡大小是56M,原因是烧录过的系统被划分为两个分区,一个是几十M(烧过wheey的是56M)的Fat32格式分区,一个是7.5G的Ext3格式分区,Ext3分区在Windows下无法读出,因此只显示几十M的Fat32分区。直接用Windows自带的格式化功能,可能只能格式化几十M的Fat32分区。因此,这里从以下地址下载SD Card Formatter,将TF卡格式化。
SD Card Formatter下载地址:https://www.sdcard.org/chs/downloads/formatter
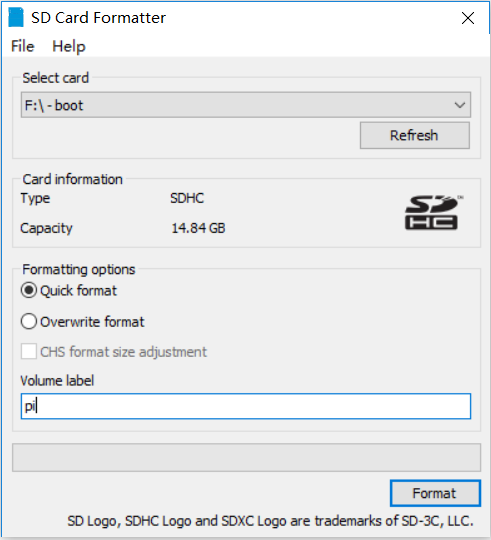
烧录TF卡
下载Etcher或Win32DiskImager,用于将下载到的树莓派系统raspbian buster烧录到格式化好的TF卡。Etcher可以直接将.zip的压缩文件形式的系统烧录到TF卡,树莓派官网推荐使用Etcher。 烧录过程中注意一定要确保选择的盘正确。
Etcher下载地址:https://etcher.io/
Win32DiskImager下载地址:https://sourceforge.net/projects/win32diskimager/
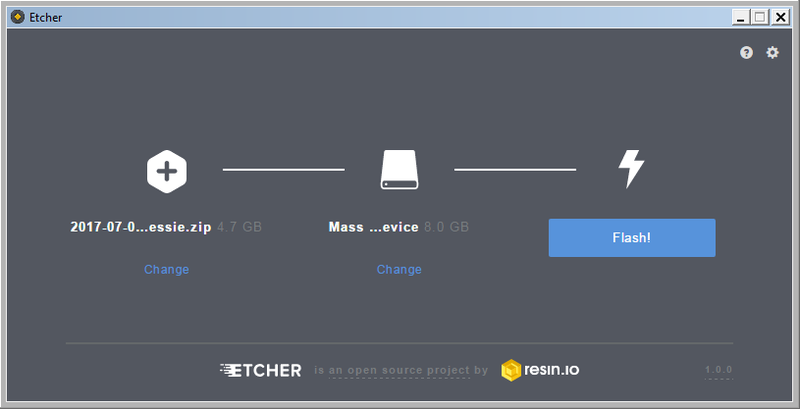
TF卡在烧录好系统后,从电脑移除TF卡,再重新插入到电脑USB口,可以看到TF卡又被重新分区了,Windows只能认出Fat32分区,打开TF卡,创建无后缀名的SSH和wpa_supplicant.conf文件,可以设置开启树莓派的SSH服务及配置WIFI(可参考树莓派 Model 4B 连接隐藏的Wifi)。
启动和连接树莓派
上面的步骤完成后,就可以从电脑移除TF卡,将它查到树莓派 4B主板的TF卡槽中,然后给电开机。这一步可以将靠近树莓派 4B主板上Type-C接口电源旁边的mini HDMI接口,通过mini HDMI数据线将树莓派连接到电视上,这样就可以在电视屏幕上看到开机画面了。当然也可以直接在电脑上通过SSH访问树莓派(需要电脑和树莓派在同一个网段,可以通过一些辅助手段来确定树莓派的IP地址),实现对树莓派的Headless访问。
SSH连接树莓派(默认用户pi,默认密码 raspberry )成功后会出现如下信息和提示符
Linux raspberrypi 4.19.97-v7l+ #1294 SMP Thu Jan 30 13:21:14 GMT 2020 armv7l
The programs included with the Debian GNU/Linux system are free software;
the exact distribution terms for each program are described in the
individual files in /usr/share/doc/*/copyright.
Debian GNU/Linux comes with ABSOLUTELY NO WARRANTY, to the extent
permitted by applicable law.
Last login: Sat Mar 14 21:46:14 2020 from 192.168.1.107
pi@raspberrypi:~ $
至此,就完成了对树莓派 4B的上手操作,Enjoy It!
树莓派相关链接
- 树莓派基金会主页: http://www.raspberrypi.org/
- Raspbian主页: http://www.raspbian.org/
- 文档: http://www.raspbian.org/RaspbianDocumentation
- Bug Tracker: http://www.raspbian.org/RaspbianBugs
- 镜像列表: http://www.raspbian.org/RaspbianMirrors
- Debian首页: http://www.debian.org/xi
 冀公网安备 13010402001886号